
You can build a small content idea board in Figma Make without writing code. Start a new Make file and ask for three columns—Idea, Drafting, and Ready—then ask Make to add the form, status controls, and filters.
In my preview, I could add a card, move it to Ready, and filter by platform. When I refreshed the preview of a copy of this board, the new test card disappeared.

I forget content ideas quickly if I don’t write them down. Yun and I both add things we want to make to our Notion board, and we update the stages so we can see what’s still an idea, what’s being drafted, and what’s finished. That gave me a small project to try in Make, with Ready meaning ready to publish.
I tested this first version on my own, so I haven’t checked how it works with Yun. The two prompts below take you through the layout and interactions, followed by three checks using one sample card. You can leave login, sharing, and a database for later.
For the writing steps after an idea is ready, see our AI content workflow.
On this page
- Start a small Figma Make web app
- The first prompt gave me a board, not a finished app
- Then I added the actions I actually wanted to test
- Before using real ideas, check what stays after a reload
- How to ask for one small fix
- What this first board can do
- Optional: attach a design reference
- Optional: name the version before a bigger change
- Optional: publish when you’re ready to share
- Sources
Start a small Figma Make web app
Open Figma and sign in. In the file browser, open Drafts, then click Make in the upper-right area. Use the prompt box in the new Make file for the next step.
Access and publishing permissions depend on your plan and seat. If you can’t see Make, check whether your workspace allows AI features and whether your account is eligible. Figma’s Make FAQ lists the current restrictions.
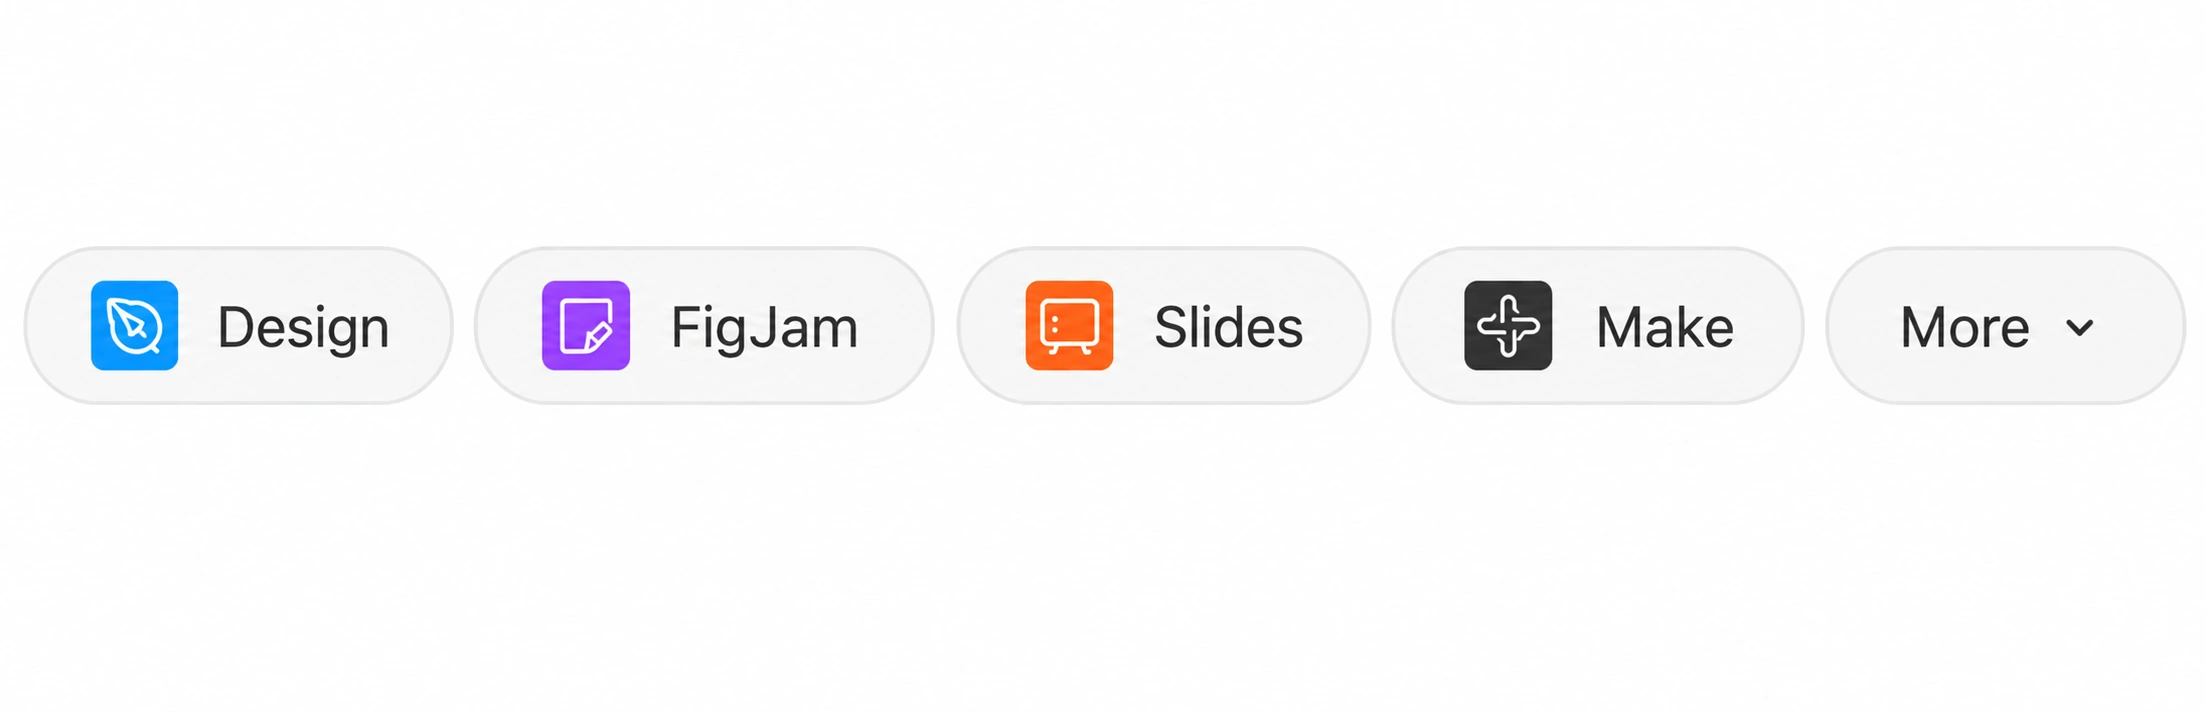
The toolbar below shows the Make button to look for.
The first prompt gave me a board, not a finished app
I asked for the columns, sample cards, and filters first. I wanted to see where everything would go before asking Make to get the form and status controls working.
Paste this into the Make prompt box, click Send, and wait for the preview to appear before checking the layout:
First prompt — layout
Create one desktop web app screen called Content Idea Board for a solo creator.

The purpose is to organize content ideas in three stages:
- Idea
- Drafting
- Ready

Build this first screen:
- A simple header with the app name and an “Add idea” button
- Three columns: Idea, Drafting, Ready
- Six realistic sample idea cards
- Each card should show a title, platform, and priority
- A compact filter row for platform and status

Keep the layout clean, readable, and practical.
Do not add login, payments, external APIs, analytics, team roles, or extra pages.
Do not build more features yet.

Before generating the screen, summarize the structure in five bullets.
You can use this prompt as it is for the first try. To make the sample cards more relevant to your work, add a sentence naming the topics you create content about.
Before moving on: check only the layout.
- Can you see all three status columns?
- Is Add idea visible without scrolling?
- Can you understand a card without opening it?
- Are the filters visible?
- Did Make add anything you explicitly told it not to add?
If Make adds an extra page or a sidebar you did not ask for, use the same Make chat to name the extra part and ask for its removal while keeping the board unchanged. Then check the layout again before adding the interactions.
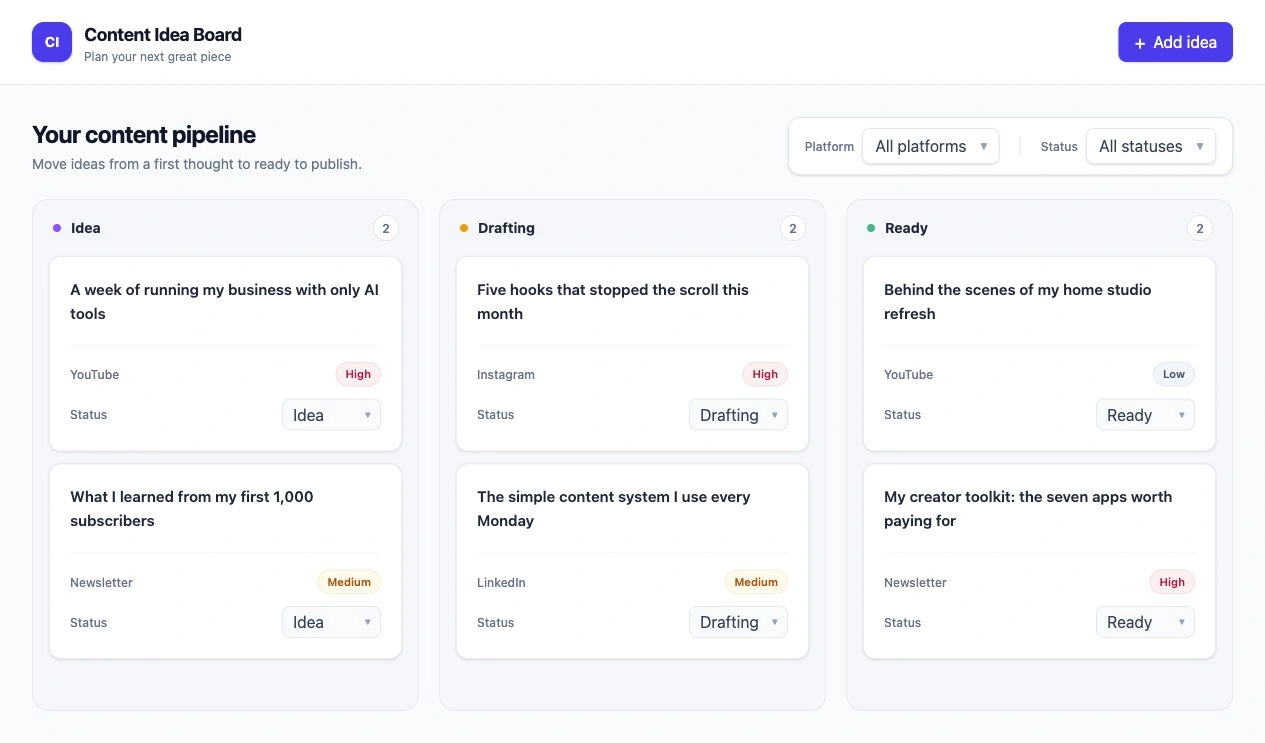
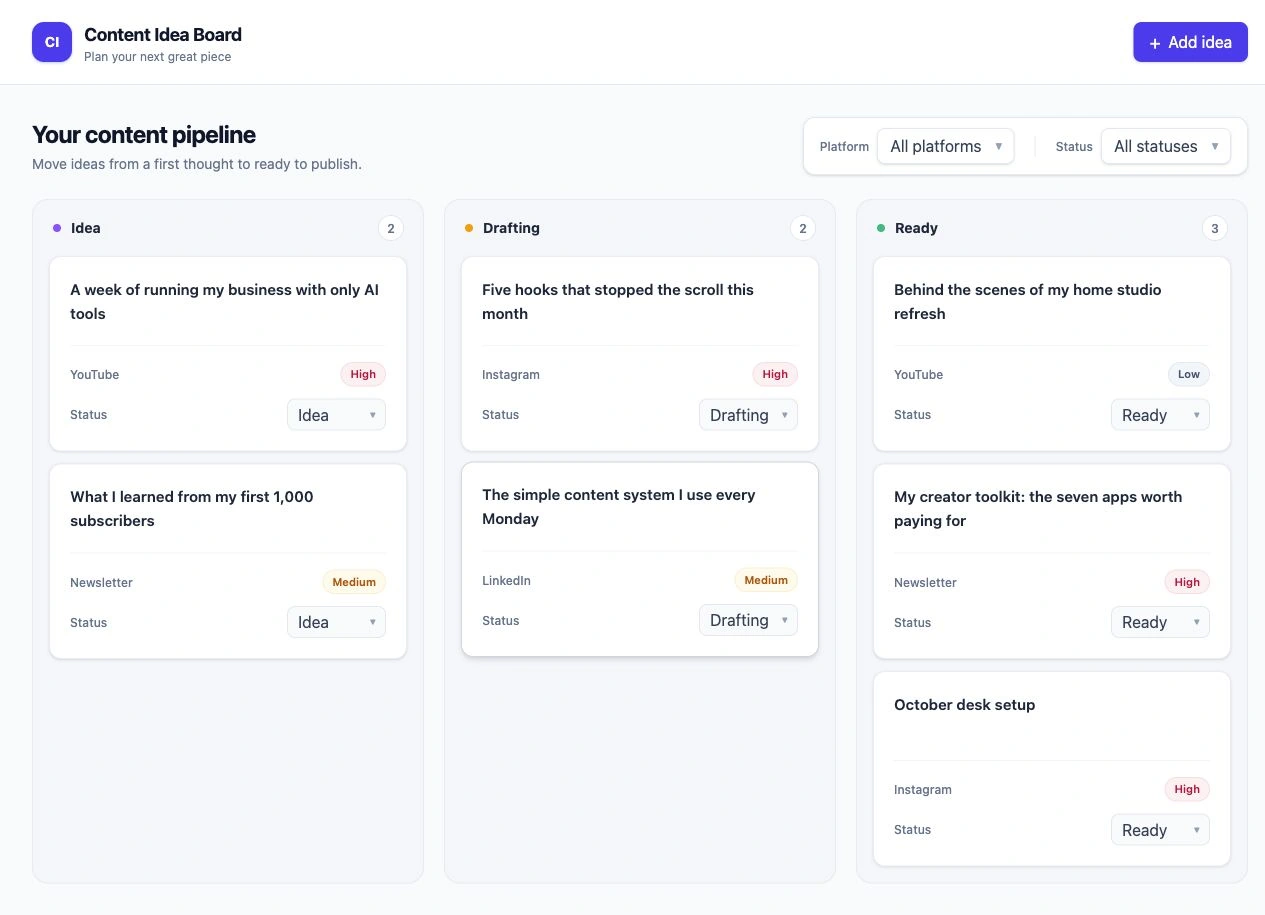
Before I added the test card, each column had two sample ideas. The preview below shows that starting point.
Then I added the actions I actually wanted to test
Once the layout looked right, I moved on to adding cards, changing their status, and filtering the board. The prompt below is adapted for you to try, with dropdown choices that match the values in my screenshots. It isn’t the exact prompt from my original build.
Suggested starting prompt — interactions
Keep the current layout.

Now make only these interactions work:

1. “Add idea” opens a small form with:
   - title
   - platform: Instagram, YouTube, Newsletter, LinkedIn
   - status: Idea, Drafting, Ready
   - priority: Low, Medium, High
   Use dropdowns for platform, status, and priority, and label the save button “Save idea”.

2. Saving the form closes it and adds the new card to the selected status column.

3. Each card has a Status dropdown that moves it between Idea, Drafting, and Ready.

4. The platform and status filters update which cards are visible. Include “All platforms” and “All statuses” options so I can clear the filters.

Do not redesign the page.
Do not add login, payments, a backend, an external API, or new pages.

When you're done, tell me exactly which three actions I should click to test the build.
Send this in the same Make chat. When the updated preview is ready, use one sample card for all three steps. These are the controls in my board; if yours has different labels, follow the matching form, card status control, and platform filter.
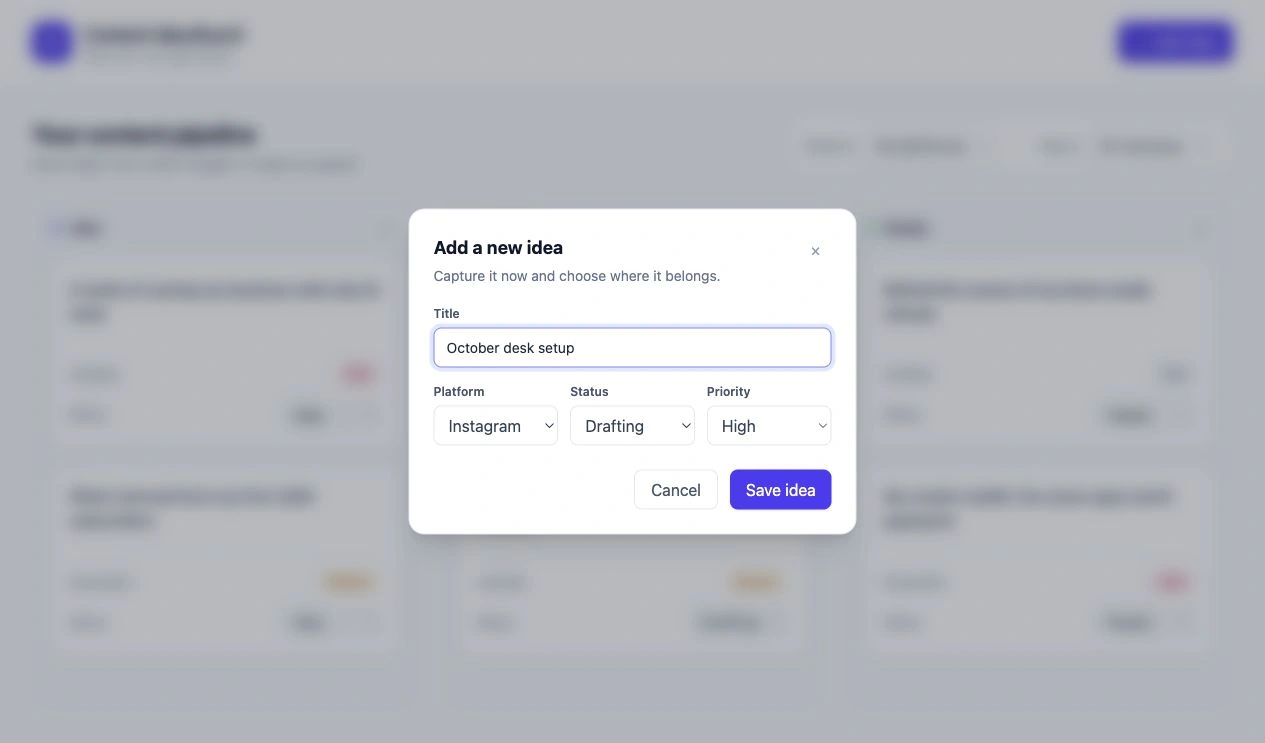
- Add the card. Click Add idea. Enter October desk setup as the title, choose Instagram for Platform, Drafting for Status, and High for Priority, then click Save idea. Look for the card in Drafting.
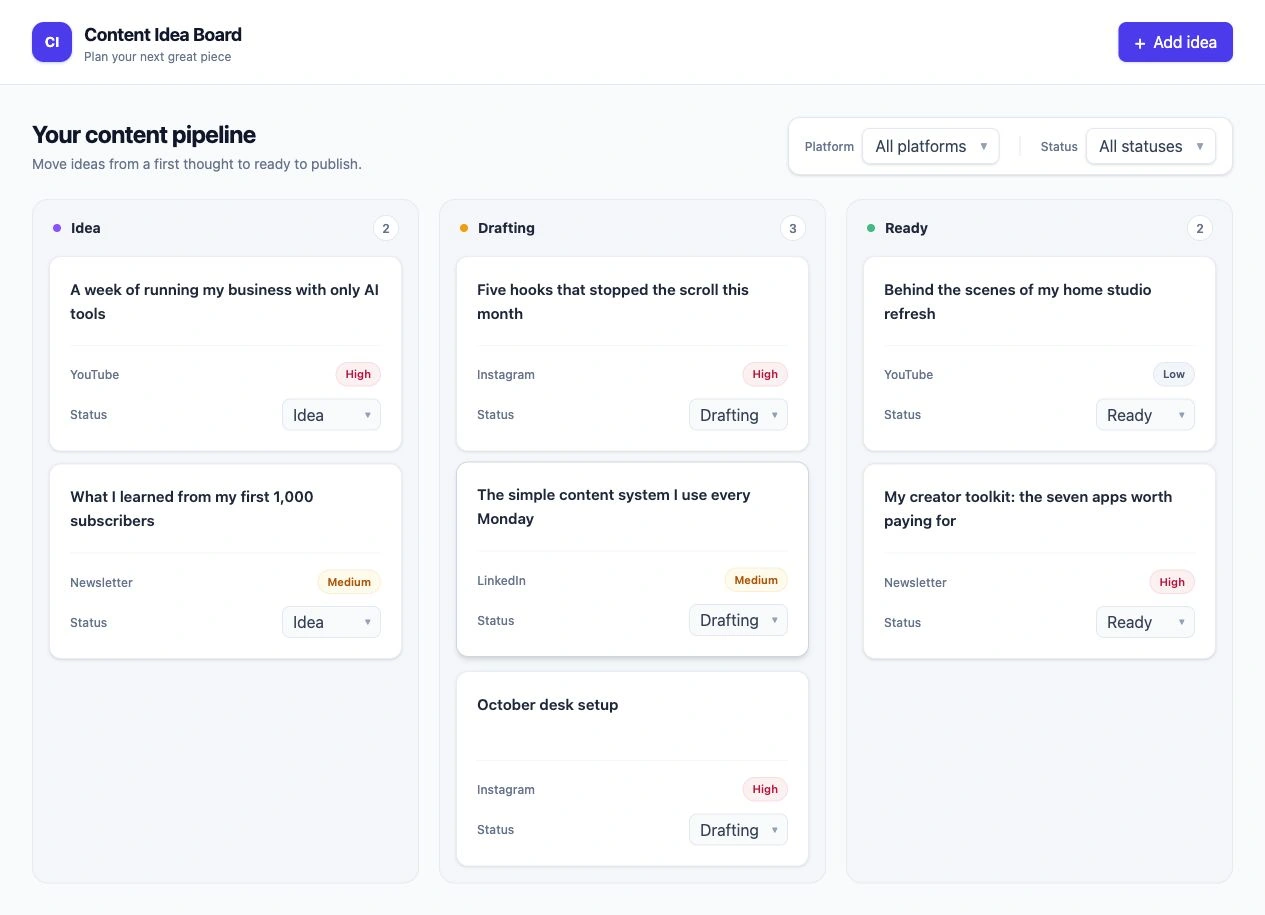
- Move it to Ready. On that card, use its Status dropdown to choose Ready. The card should leave Drafting and appear in Ready with the same title, platform, and priority.
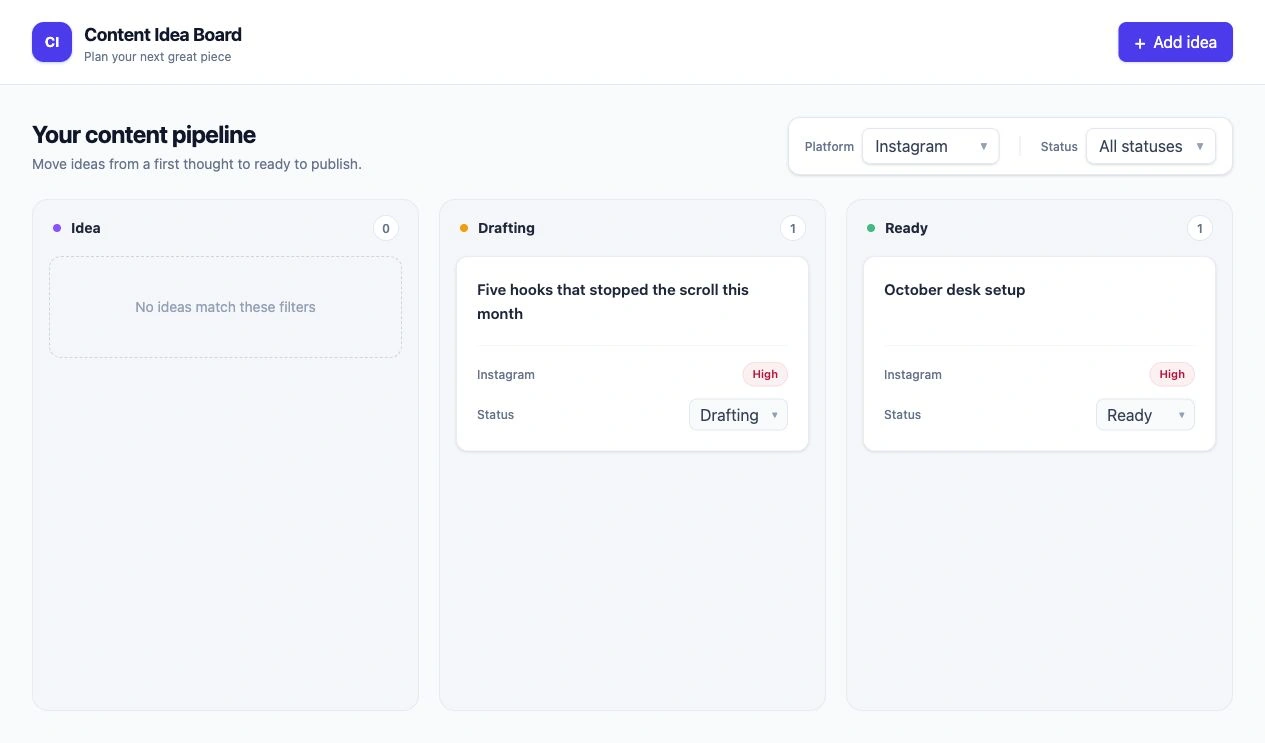
- Filter for Instagram. Set the Platform filter at the top of the board to Instagram and leave the top-row Status filter on All statuses. Your card should stay visible in Ready while cards for other platforms disappear. Choose All platforms to bring them back.
The table below helps you describe a problem if one of those steps fails.
| Test | Do this | Pass | If it fails |
|---|---|---|---|
| Add | Add a card called “October desk setup” to Drafting | The card appears in Drafting | Ask Make to fix only the save action and leave layout unchanged |
| Status | Move that card to Ready | It appears in Ready | Target the card/status control instead of reprompting the whole app |
| Filter | Filter to one platform | Only matching cards remain | Name the exact filter that failed and the expected visible cards |
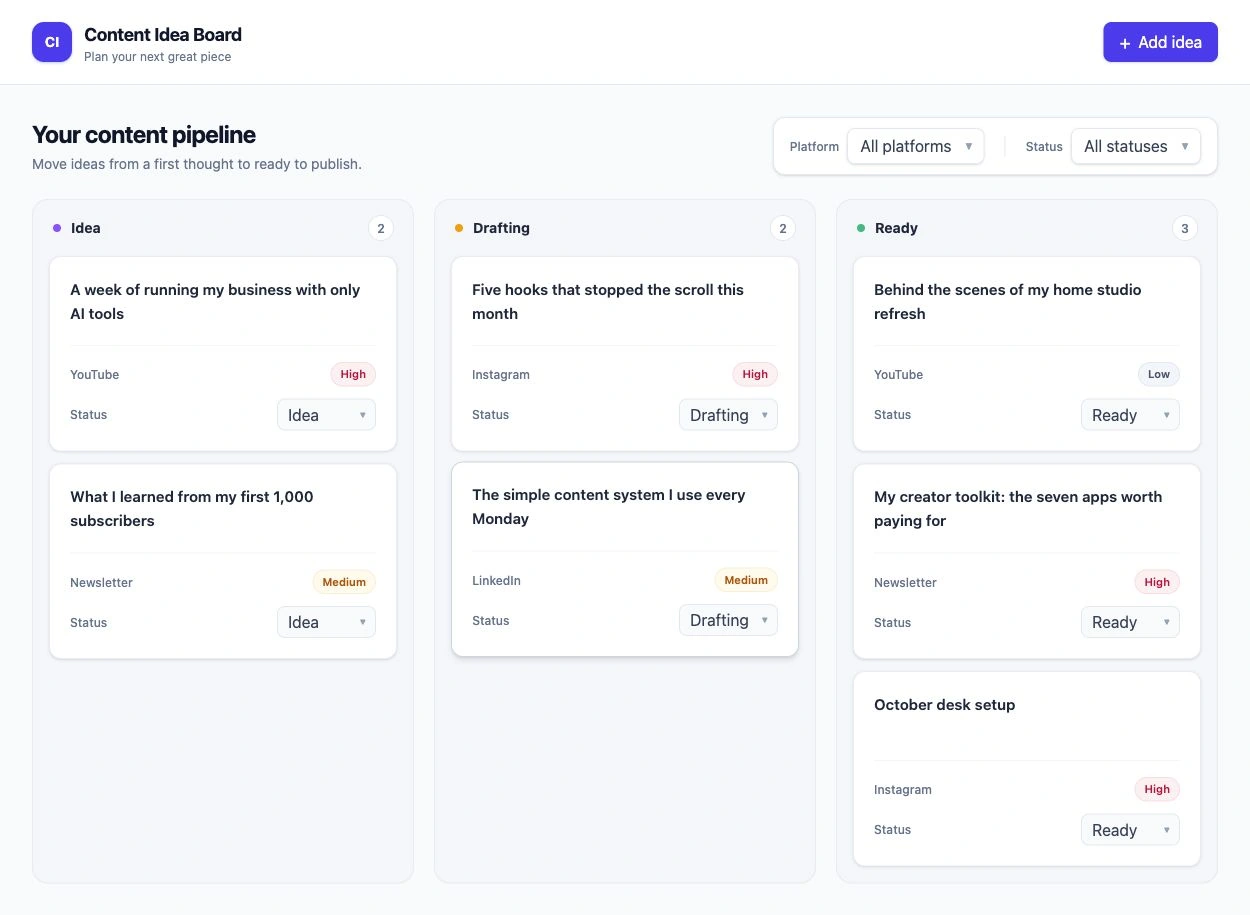
I used those same values for my test. I recaptured the form, saved card, status change, and filter results from the existing preview on October 24, 2026, so you can compare each step with the screenshots below.
Before using real ideas, check what stays after a reload
The screenshots show the card being added, moved, and filtered while the preview is open. In a separate November 4, 2026 test, I added a card to a copy of this board. The count went from six to seven. After I refreshed the preview in the same Chrome tab and it finished loading, only the original six sample cards remained.
To check your own board, add a test card and refresh the preview. Set both filters to All platforms and All statuses, then look for the card and check its details. Keep your real ideas in Notion until you’ve verified that your board saves them.
How to ask for one small fix
If the form opens but no card appears after saving, tell Make what happened after you clicked Save idea. Ask it to change that action and leave the rest of the board alone. Otherwise, a request to fix the form can turn into a redesign of parts that already worked.
Suggested fix — use this only if the form doesn’t save your card:
Change only the Add Idea form behavior.

After I click Save:
- close the form
- add the new card to the status I selected
- keep my title, platform, and priority values
- do not change the board layout or card styling

Do not modify any other interaction.
After that change, try saving the same test card again. Check that the form closes, the card appears in Drafting, and its title, platform, and priority match what you entered.
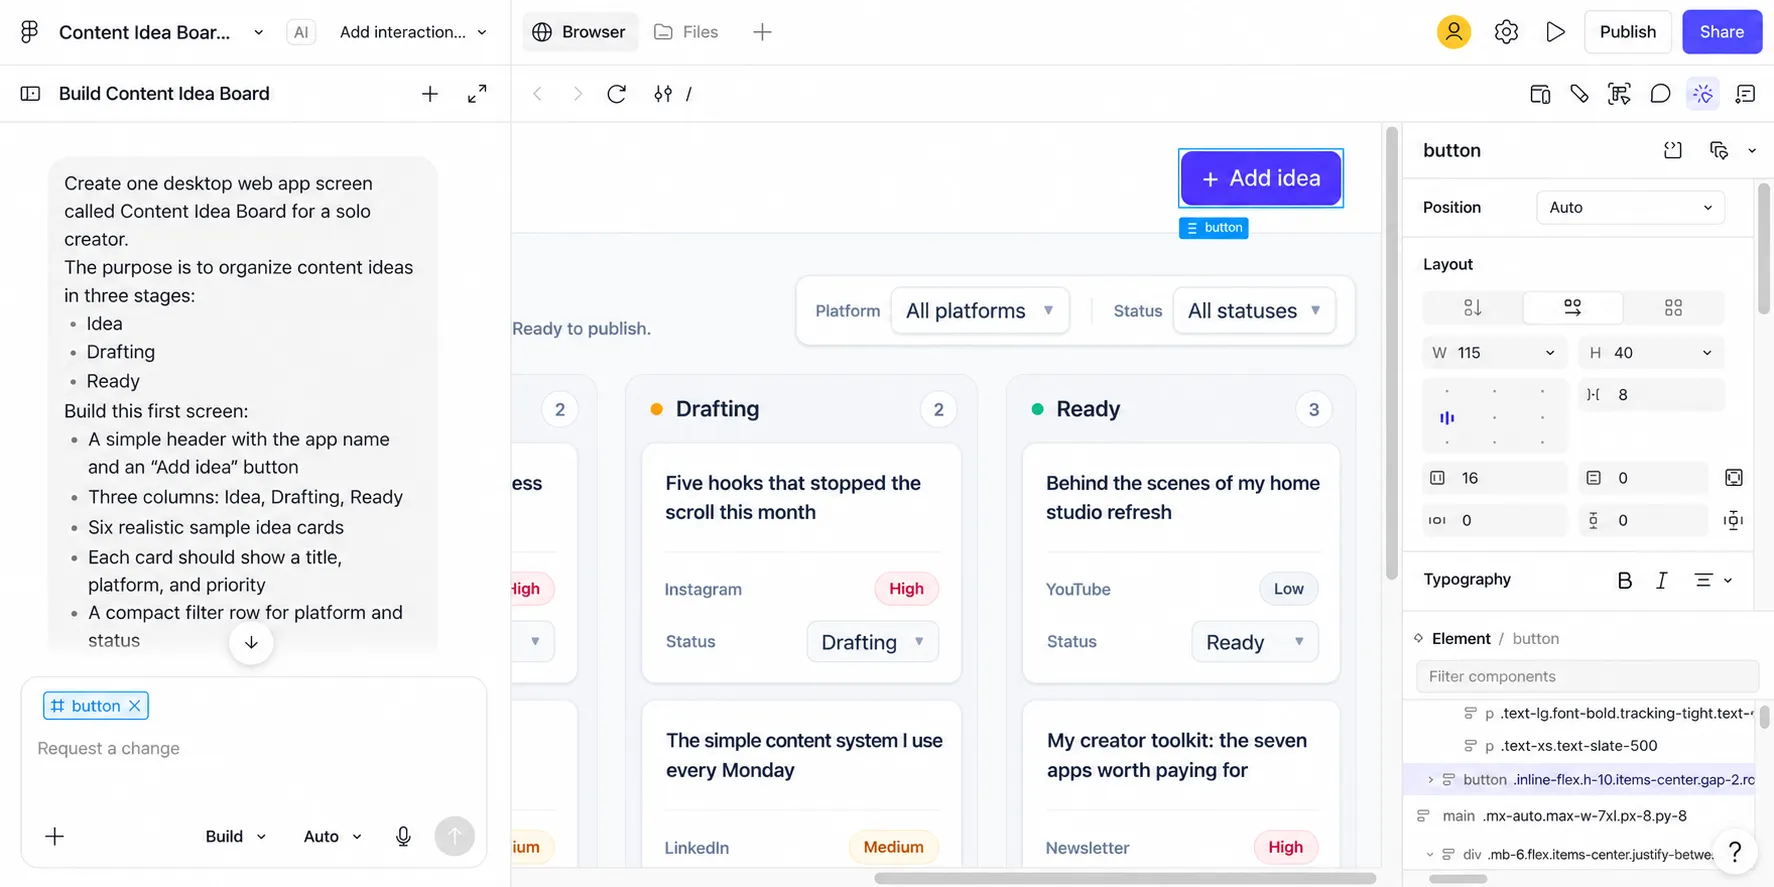
Visual changes are optional after those three actions work. Figma Make has an Edit mode with a properties panel. You can select a button or another element directly in the preview. Figma says this Edit tool and panel are available in new Make files; older files may still show the previous point-and-edit interface.
For spacing, type size, padding, fill, or corner radius, open the Browser tab, click Edit, and choose Select. Click the element in the preview and adjust its properties in the panel. Then click Apply in the chat to keep the change.
Below, I’ve selected Add idea in Edit mode. The panel on the right shows its properties. I left the button as it was.
What this first board can do
I’d use this board to try out adding, moving, and filtering a card. Before putting real ideas in it, add a test card and refresh the preview. The new card disappeared in my test copy, so I’d keep my real ideas in Notion for now.
Optional: attach a design reference
I didn’t use a design reference for this board. Figma’s documentation says you can attach one to guide the styling of an existing Make file.
Start with one frame. Use Add context → Designs to attach it, or paste the frame when your interface supports that. Then send:
Use the attached frame as a visual reference for this existing Content Idea Board.

Keep the current app structure and working interactions.
Match the reference's spacing, typography hierarchy, corner radius, and overall visual density.

Do not add new pages or features.
Do not replace working interactions just to match the reference.
You can skip this if you don’t have a reference.
Optional: name the version before a bigger change
Figma saves versions automatically as you or the agent edits the file. Before a redesign, open Version history at the top of the chat panel, then More options → Name this version. Try working-add-status-filter.
Run the same three checks after the redesign. If an action stops working, preview or restore the earlier version from its menu. This restores the app build; it doesn’t confirm that cards entered in the preview will be kept.
Optional: publish when you’re ready to share
I didn’t publish this board; these steps come from Figma’s documentation. Open Publish in the upper-right and review the title and settings before confirming publication to a Figma-hosted URL.
Without password protection, anyone with the URL can open the app. New Make sites aren’t indexed by search engines by default, but the link still gives access.
Before sharing:
- Replace real names, private drafts, and sensitive content with sample data.
- Open the published URL in a private/incognito window, confirm it’s the intended version, and check every button.
Plan note: Figma’s FAQ says publishing on paid plans requires a Full seat. Starter users must also publish the Make file to Figma Community. If Publish is unavailable, check your plan, seat, and workspace permissions.